Description
Introduction to the intersection of physics and biology including information on the tools (3D printing, microscopy, electronics, MATLAB, etc.) and methods used in studying the physics of living systems.
Protocols

Goal: Turn your smartphone into a microscope by designing and 3D printing a stage (or clip) that can be used with ball lenses of varying diameter (inspired by the work of Anton van Leeuwenhoek). Convert a webcam into a microscope by inverting the lens.
Download pdf- 3D printer
- calipers
- rubber sheet
- ball lenses: dia. = 1.0mm, dia. = 0.7mm
- Solidworks
- smartphone (with front & back camera)
- LEDs/phone flashlight
- light diffuser (filter paper, plastic, etc.)
- webcam
- scrap materials for stand (wood, 80/20, cardboard, etc.)
- lenses
- small screwdriver for webcam screws
Phonescope
Webscope
- Design your own smartphone microscope in Solidworks that includes the following features:
- slide holder
- lens holder
- aperture (light window)
- adjustable field of view (ability to explore sample on slide)
- able to accommodate multiple lenses (with different diameters)
- Double check all measurements with the calipers and then print your design.
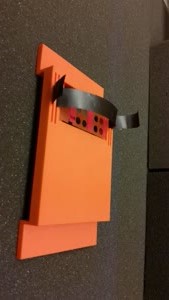
- Using a small needle, poke a hole in a strip of the rubber sheet and insert a ball lens.
- Add the rubber sheet to your printed "phonescope."
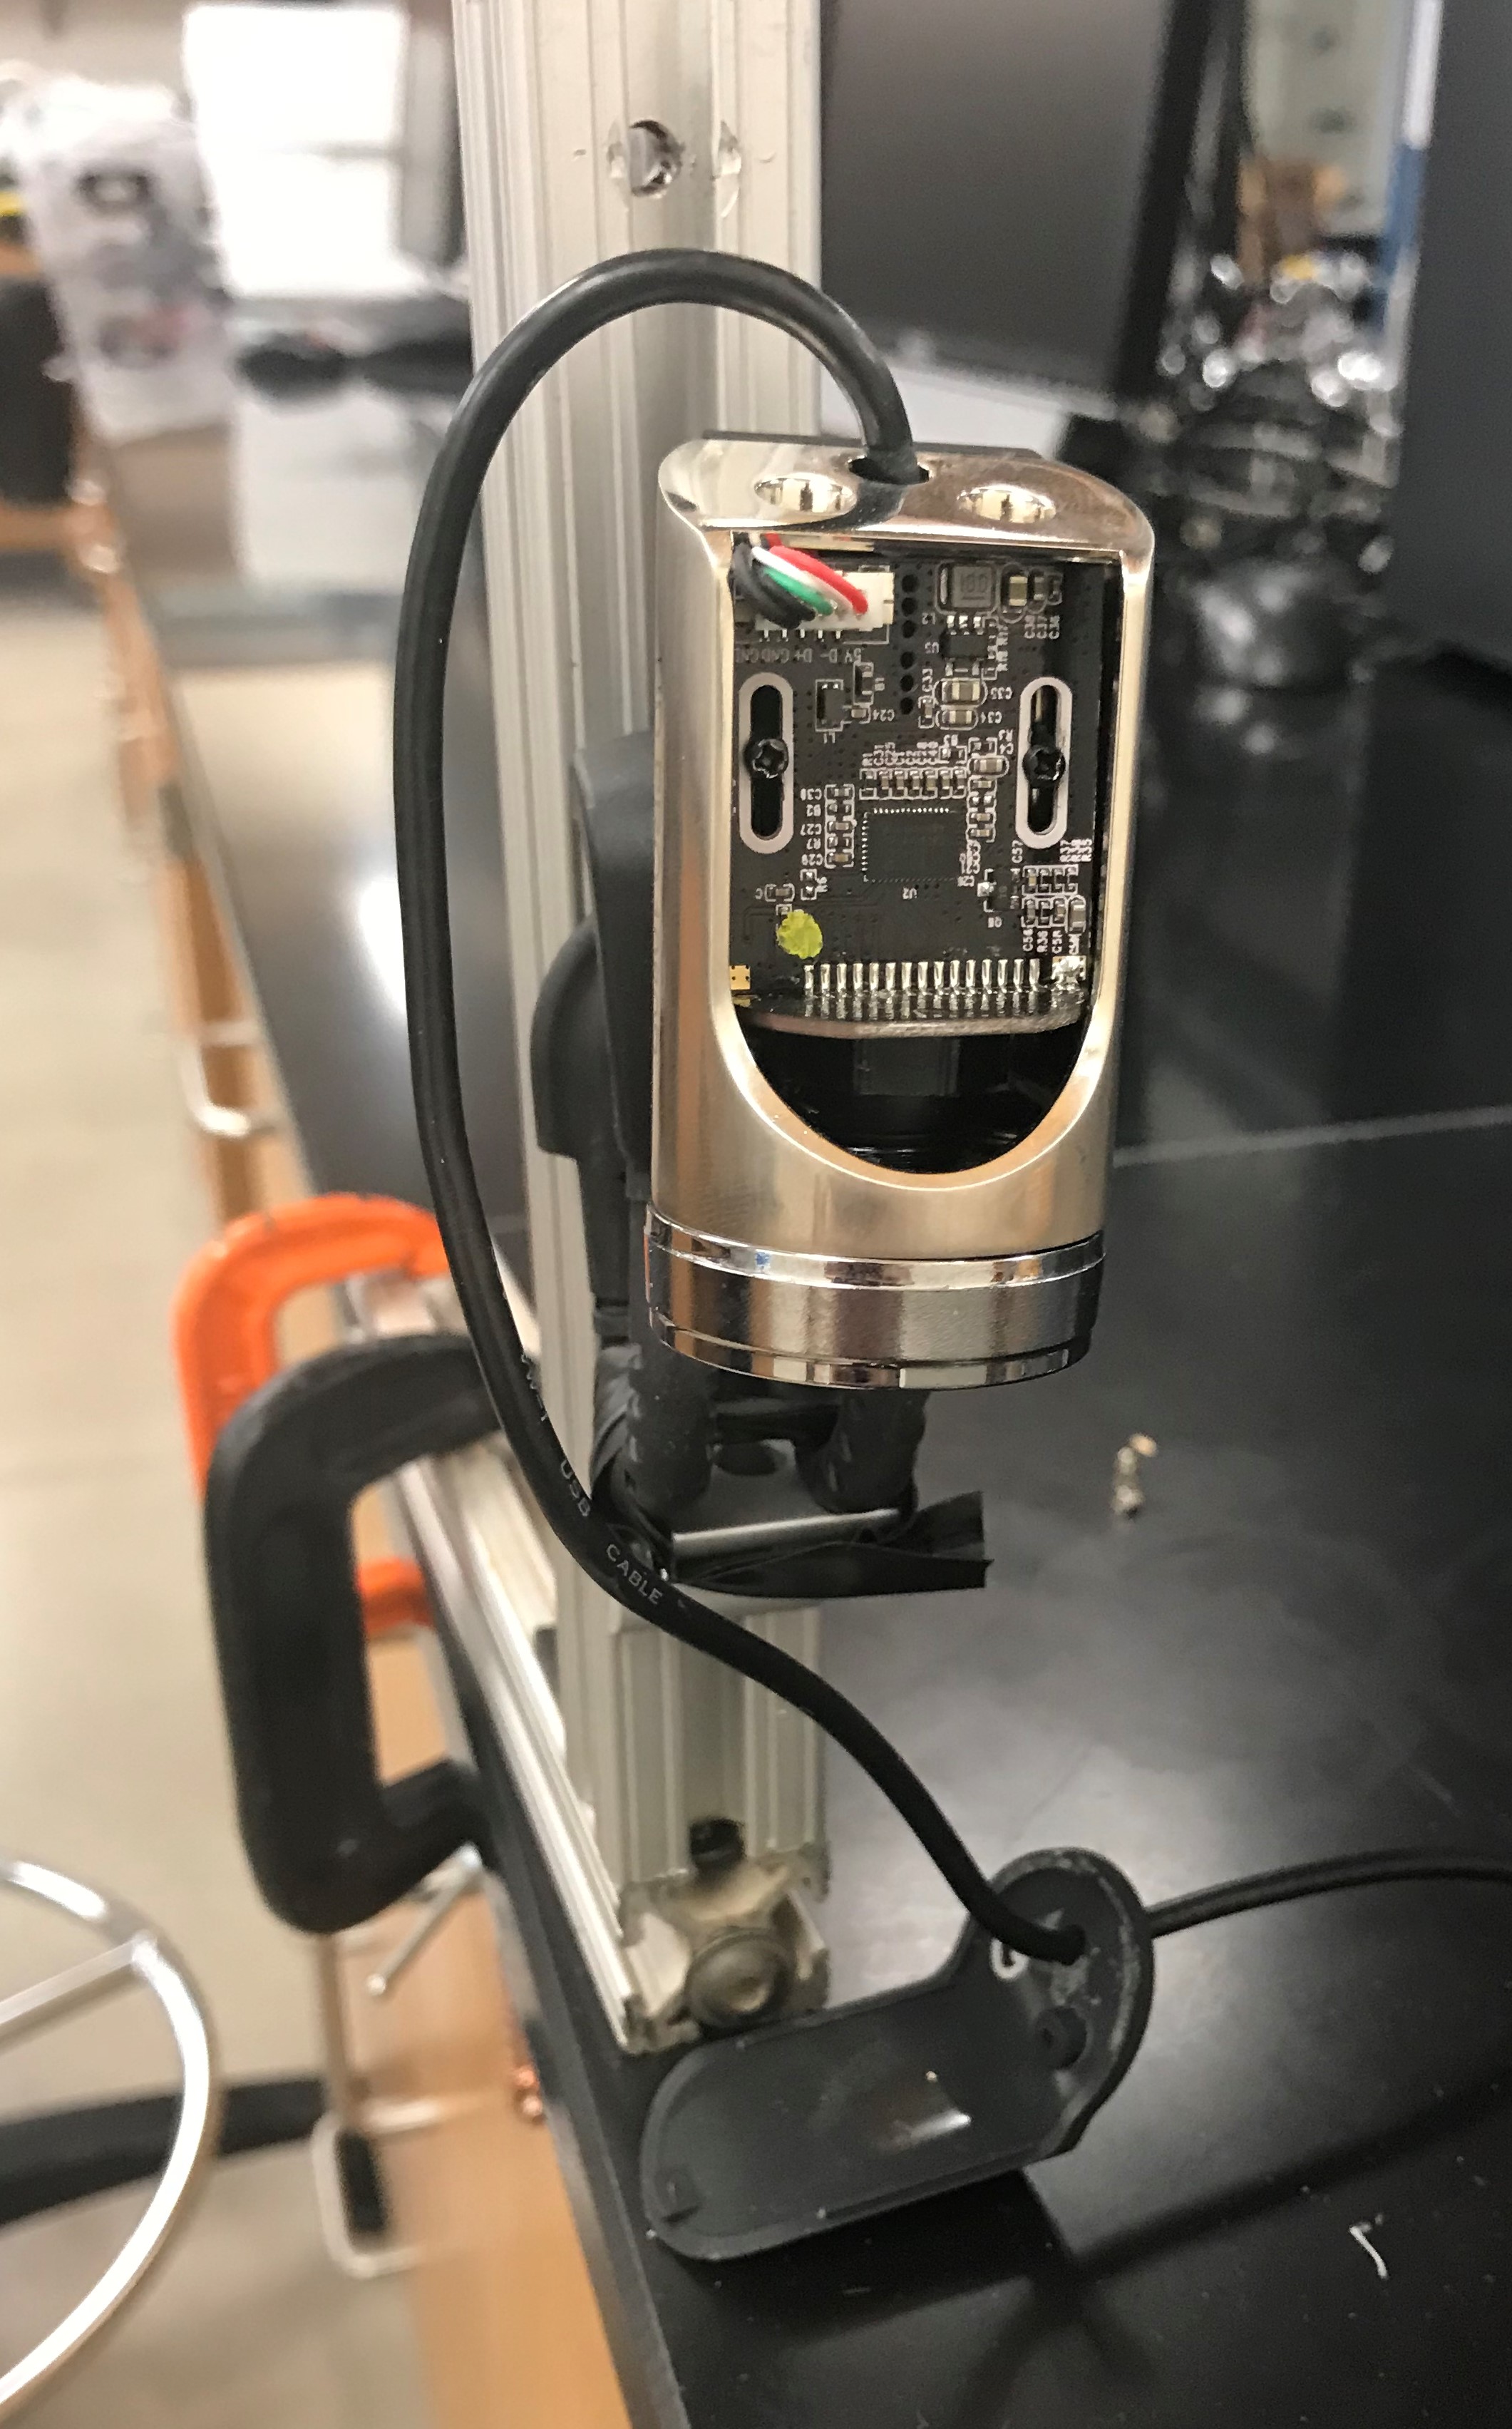
- Remove the casing of the webcam so the baord and lens is visible
- Unscrew the lens, flip it, and reattach
- Build a stand for the webcam so you can easily move the specimen you're examining up and down to focus it
- Use different lens attachments to increase the magnification
- Phonescope
Webscope
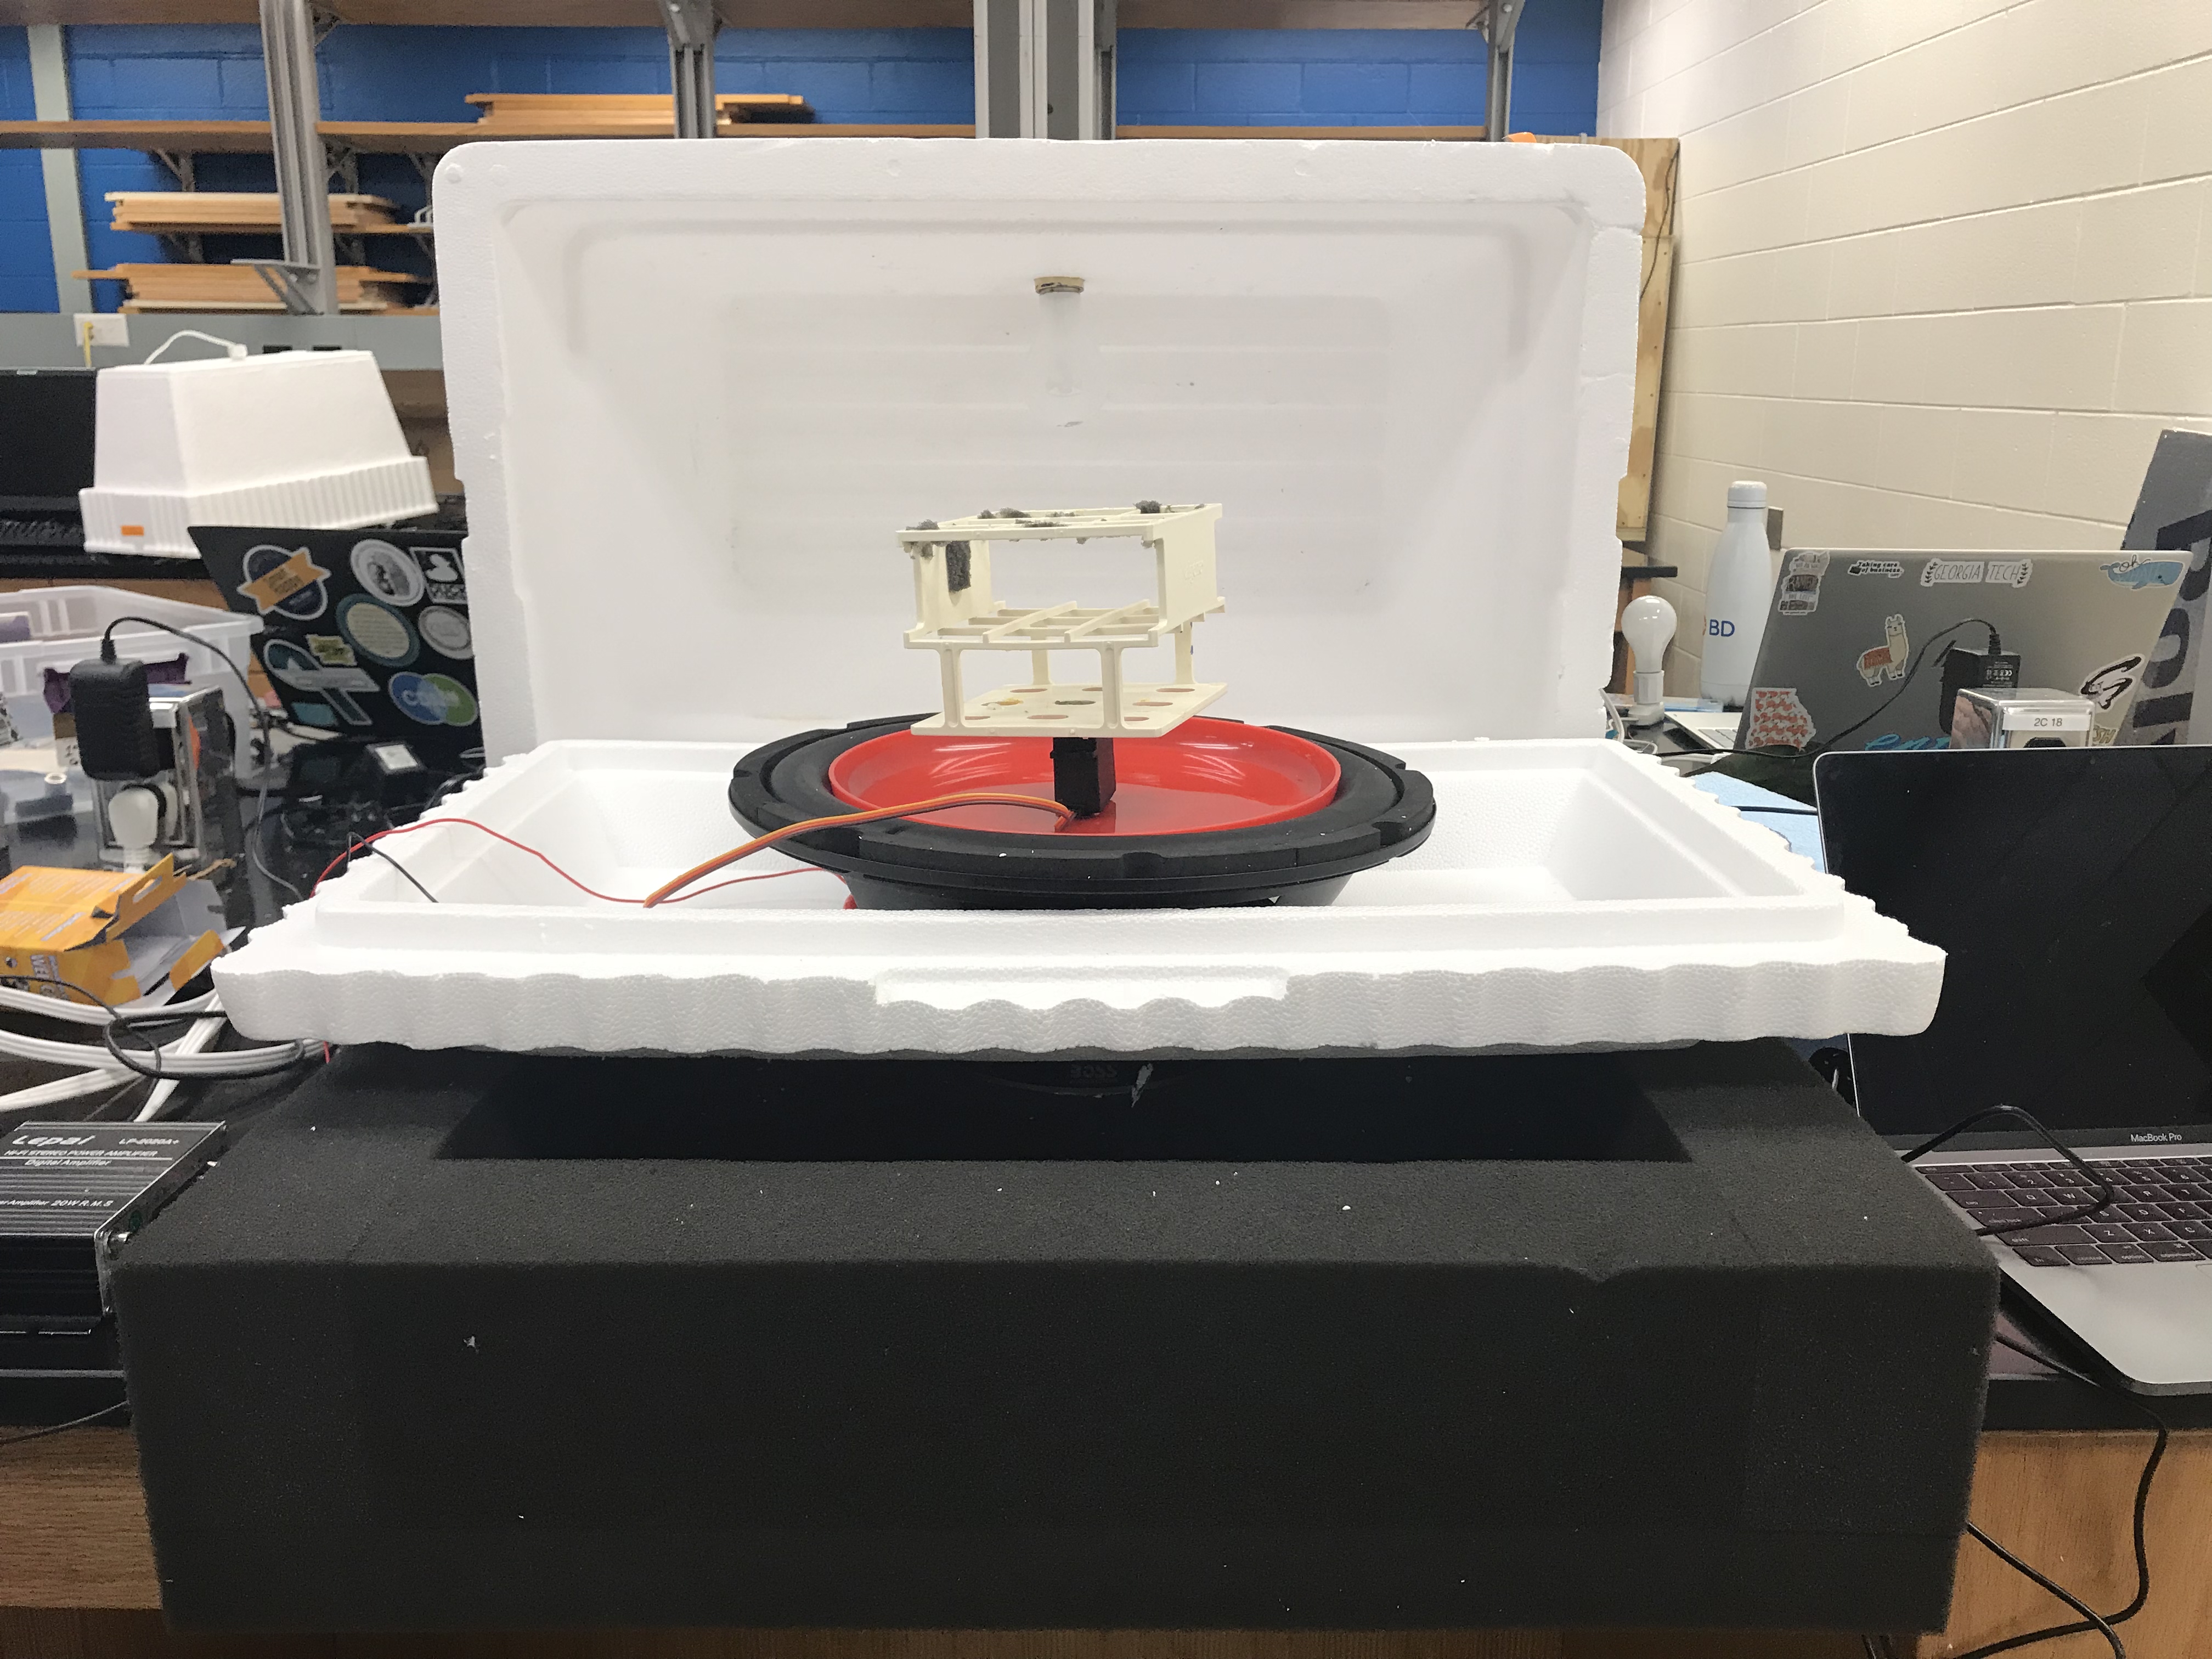
Goal: Construct a laboratory shaking incubator that can provide vigorous shaking for culture tubes (25mm X 150mm test tubes) and maintains a constant, uniform temperature (30 deg C OR 37 deg C).
Download pdf- 12" bass speaker/ subwoofer
- audio mono amplifier (each amplifier should drive 2 speakers)
- function generator:for testing: smartphone signal generator app for culturing: Arduino – tone() command
- breadboard
- 3.3-5V wall wart/battery (for Arduino)
- power supply for amplifier (ADC comes with amplifier)
- base and test tube holder
- hot glue gun and glue
- alligator clips/lead wires
- Arduino Uno and 6' USB plug
- servo motor
- large Styrofoam (or other insulating material) box
- 40W light bulb
- socket and plug for light bulb
- TMP36 (temperature sensor)
- solid state relay (SSR - switch)
- extension cord
- microSD card (optional)
- transflash microSD breakout board (optional)
- First, gather materials and ensure that speaker fits inside the insulating box with sufficient clearance and spare room for test tube holder (cut box and reseal, if needed).
- Connect extension cord to SSR output terminals and solder wires to the input terminals.
- Connect TMP36 to Arduino (first with breadboard, then by soldering once it's working).
- Copy (and/or improve) the example code included into Arduino program and upload to board.
- Calibrate your code such that the temperature sensor is used to control whether the light bulb (heat source) is on or off (bang-bang control).
- Download a signal generator app and set the Frequency Range Minimum to 0 [Hz] and the Frequency Range Maximum to (at least) 20K [Hz].
- Connect your speaker(s) to the output of the audio amplifier and then connect the amplifier to the power supply.
- Using the signal generator app on your phone, supply a signal to the amplifier and test the output of the speaker (disconnect power supply when done).
- Now, use the tone() command to send a signal to the speaker through the Arduino (see example code below) and figure out the best frequency for shaking (40 Hz?, 45 Hz?, 200 Hz?)
- Once the shaking level is sufficient, hot glue your printed test tube rack and plate to the speaker.
- Finally, test if incubator can maintain a constant temperature while shaking overnight.
#include

//TMP36 Pin Variables
int sensorPin = 0; //the analog pin the TMP36's Vout (sense) pin is connected to
                        //the resolution is 10 mV / degree centigrade with a
                        //500 mV offset to allow for negative temperatures

// light bulb
int RELAY1 = 9;

// speaker
int shake1 = 10;
int shake2 = 11;

// servo
int servoPin = 6;
int angle = 0;   // servo position in degrees
Servo servo;


/*
 * setup() - this function runs once when you turn your Arduino on
 * We initialize the serial connection with the computer
 */
void setup()
{
  Serial.begin(9600);  //Start the serial connection with the computer
                       //to view the result open the serial monitor
  pinMode(RELAY1, OUTPUT);
  pinMode(shake1, OUTPUT);
  pinMode(shake2, OUTPUT);

servo.attach(servoPin);

}

void loop()                     // run over and over again
{
 //getting the voltage reading from the temperature sensor
 int reading = analogRead(sensorPin);

 // converting that reading to voltage, for 3.3v arduino use 3.3
 float voltage = reading * 5.0;
 voltage /= 1024.0;

 // print out the voltage
 Serial.print(voltage); Serial.println(" volts");

 // now print out the temperature
 float temperatureC = (voltage - 0.5) * 100 ;  //converting from 10 mv per degree wit 500 mV offset
                                               //to degrees ((voltage - 500mV) times 100)
 Serial.print(temperatureC); Serial.println(" degrees C");

 //cells = 37   // incubator ideal temp
 //yeast  = 30  incubator ideal temp

//while(1){
  //digitalWrite(RELAY1,LOW);
 // delay(1000);
 // digitalWrite(RELAY1,HIGH);
 // delay(1000);
//}

  if (temperatureC < 30) {
    digitalWrite(RELAY1,HIGH);
    Serial.print("T < 30 degrees C -- LIGHT ON");
    Serial.print("\n");
   } else {
   digitalWrite(RELAY1,LOW);
   Serial.print("T > 30 degrees C -- LIGHT OFF");
    Serial.print("\n");
  }


 tone(shake1,45);
 tone(shake2,45);


  // scan from 0 to 40 degrees
  for(angle = 0; angle < 40; angle=angle+20)
  {
    servo.write(angle);
    delay(300);
  }
  // now scan back from 40 to 0 degrees
  for(angle = 40; angle > 0; angle=angle-20)
  {
    servo.write(angle);
    delay(300);

 delay(10000);      // wait 10 seconds


 }
Goal: To achieve a deeper understand of the amount of life present in a drop of water students will use their converted webcam microscopes to capture an image of an organism in pond scum. Based on the images and observations, they must also identify the organism.